Step-by-Step Guide to Creating Quizzes with Microsoft Forms
Master quiz creation with Microsoft Forms using this step-by-step guide. Learn to design engaging quizzes, customize settings, and analyze results for improved learning and feedback assessment.
Creating engaging quizzes is one of the most effective ways to gather feedback, assess knowledge, or make learning fun. Microsoft Forms is a powerful tool that allows you to easily create quizzes and surveys, whether you're an educator, business owner, or just someone looking to collect information efficiently. In this step-by-step guide, we’ll walk you through how to create a quiz using Microsoft Forms in a straightforward and user-friendly way. Let’s dive in!
What is Microsoft Forms?
Before we start building our quiz, it’s helpful to understand what Microsoft Forms is.Microsoft Forms is a web-based app within the Microsoft 365 suite that allows users to create surveys, quizzes, and polls. It’s simple to use, mobile-friendly and integrates seamlessly with other Microsoft tools like Excel, SharePoint, and Teams. It’s beneficial for educational purposes, but can also be an asset for businesses, HR departments, or anyone needing to gather data.
Why Create a Quiz in Microsoft Forms?
Here’s why Microsoft Forms is a great tool for creating quizzes:
User-friendly Interface: Its clean design makes quiz creation intuitive.
Built-in Grading: Perfect for educators, Microsoft Forms has an automatic grading feature, which can save you a lot of time.
Accessibility: Because they are web-based, quizzes can be accessed from any device, anywhere, without the need for installation.
Integration with Microsoft Ecosystem: If you’re already using Microsoft 365, Forms easily integrates with apps like Excel for data tracking.
Now that we have an overview, let’s get into the details!
Step 1: Access Microsoft Forms
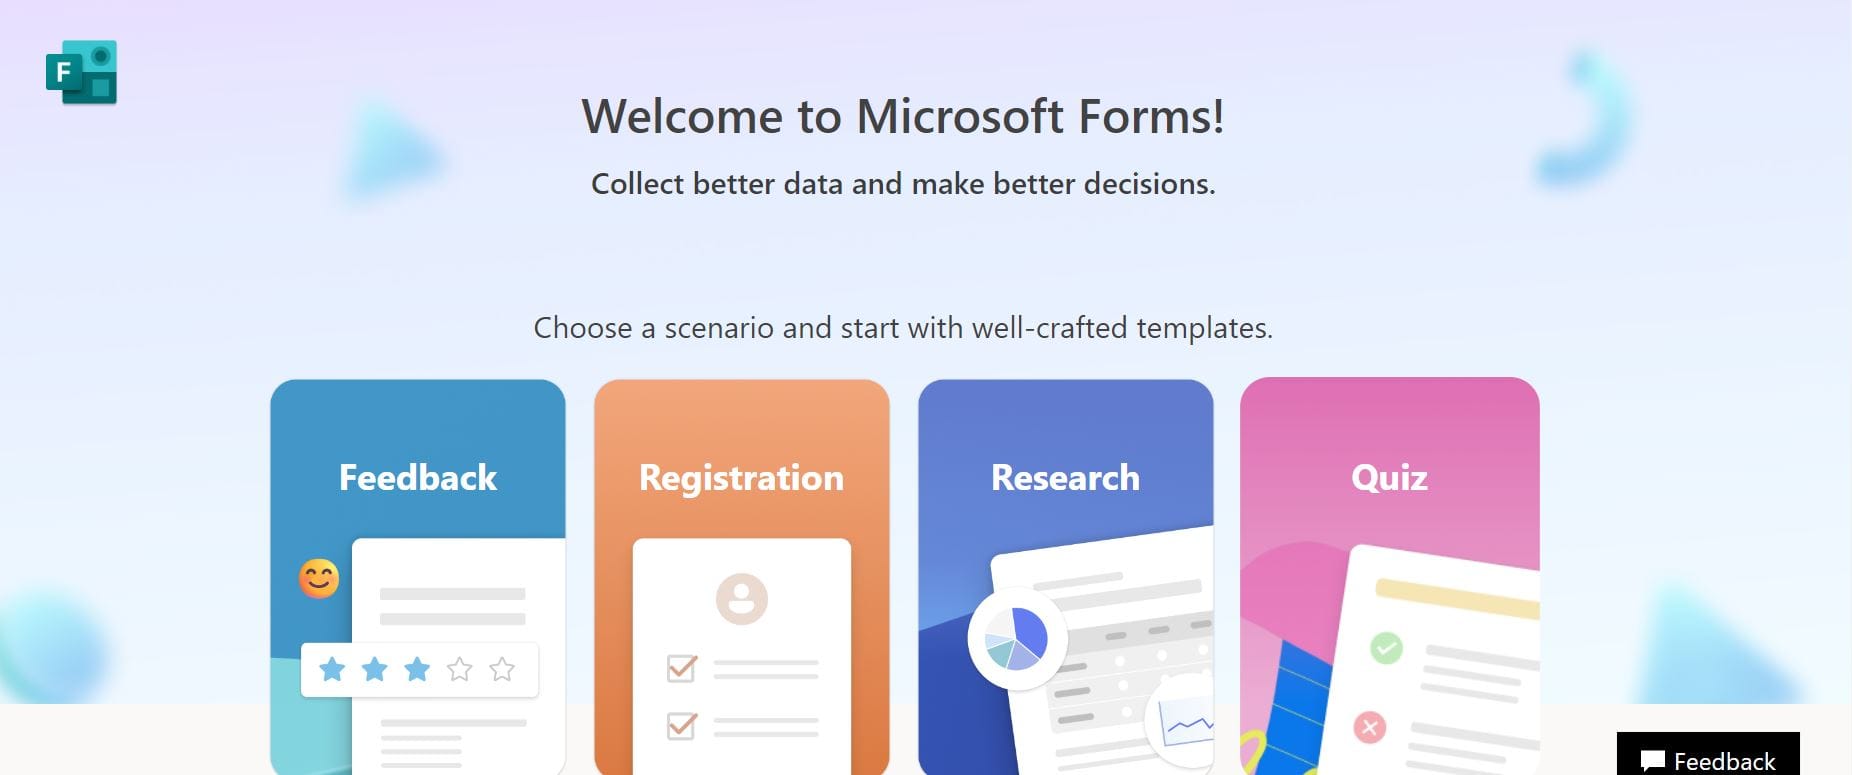
First things first—open Microsoft Forms. You can do this in two ways:
Go to the Microsoft Forms website and log in with your Microsoft account.
If you’re already using Office 365, navigate to Microsoft Forms via the app launcher.
Step 2: Create a New Quiz
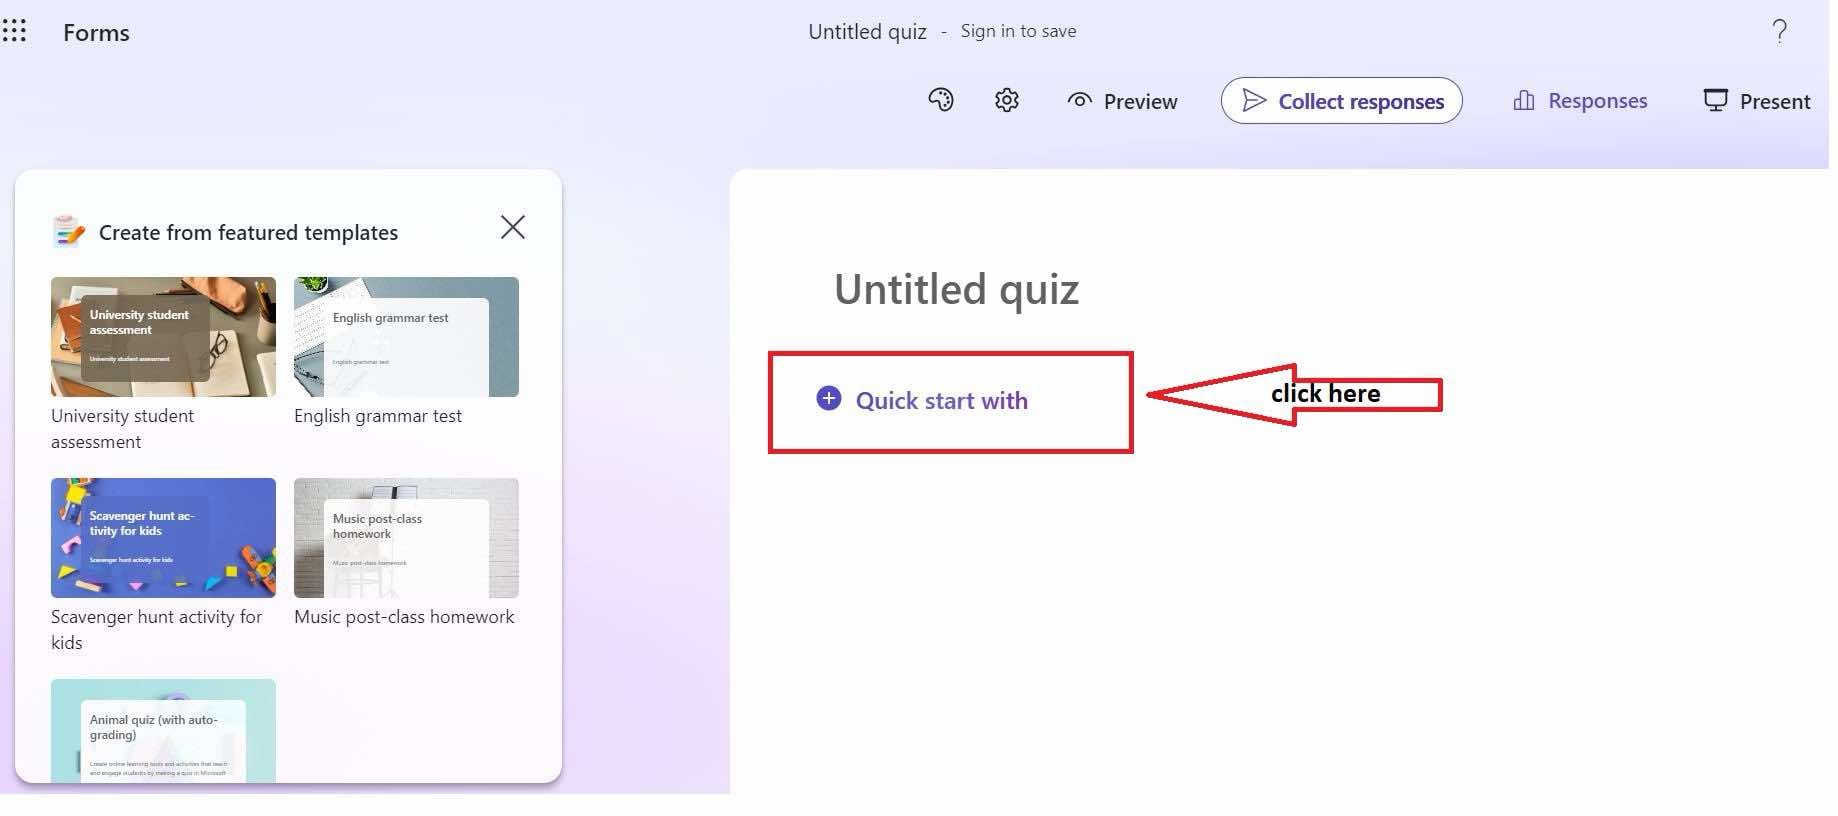
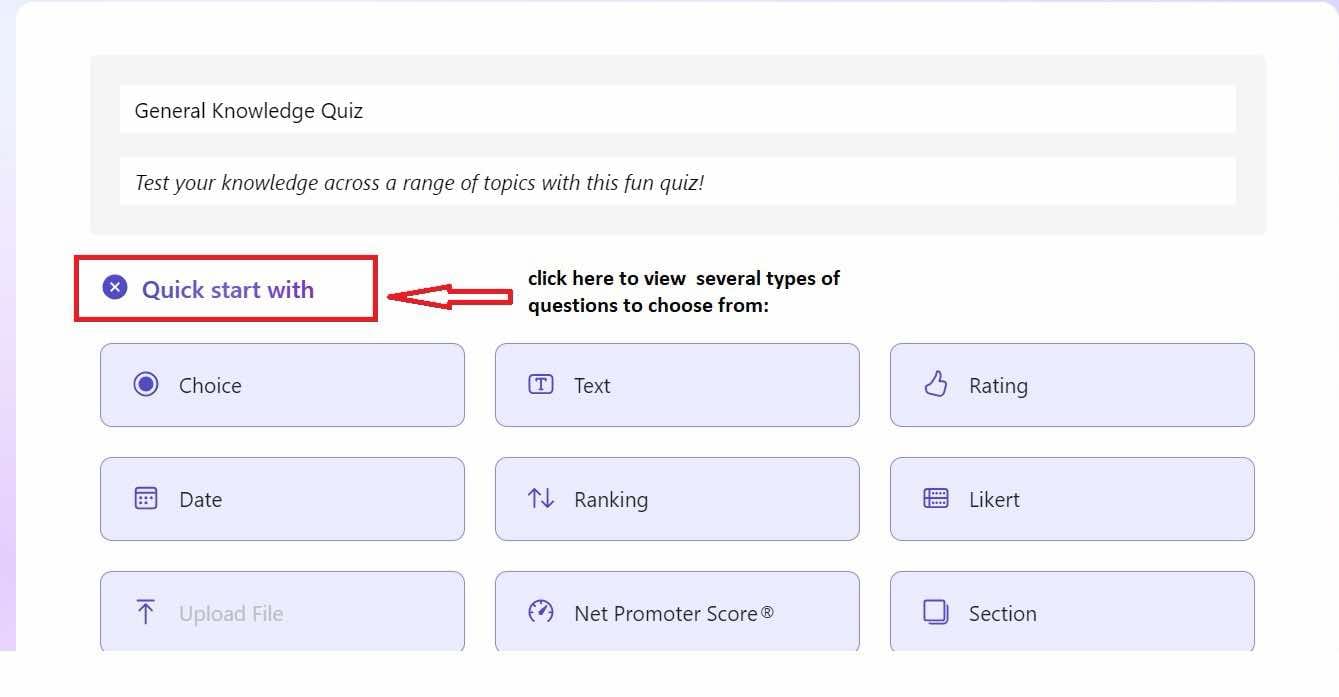
On the Forms homepage, click "Quick start with". This option is specifically for creating quizzes, as it includes additional functionality like assigning correct answers and giving feedback for each response.
Step 3: Customize Your Quiz Title and Description
It’s always good to give your quiz a strong and engaging title. The title should reflect the purpose of your quiz—something like "Science Quiz for Beginners" or "Customer Satisfaction Quiz". Below the title, you can add a short description to give users context on what they’re about to take part in. Keep it brief but informative

For example:
Title: General Knowledge Quiz
Description: Test your knowledge across a range of topics with this fun quiz!
A catchy description can encourage more people to participate.
Step 4: Add Questions to Your Quiz
Now, the real fun begins! Click “Quick to start” to start adding questions to your quiz. Microsoft Forms gives you several types of questions to choose from:
Multiple Choice: Perfect for quiz questions with single or multiple correct answers.
Text: Allows users to input their answers. This can be useful for open-ended questions.
Rating: If you want users to rate something, for example, “How did you enjoy this quiz?
Date: Good for scheduling or inputting a specific date. Good for scheduling or inputting a specific date.
Adding a Multiple-Choice Question:
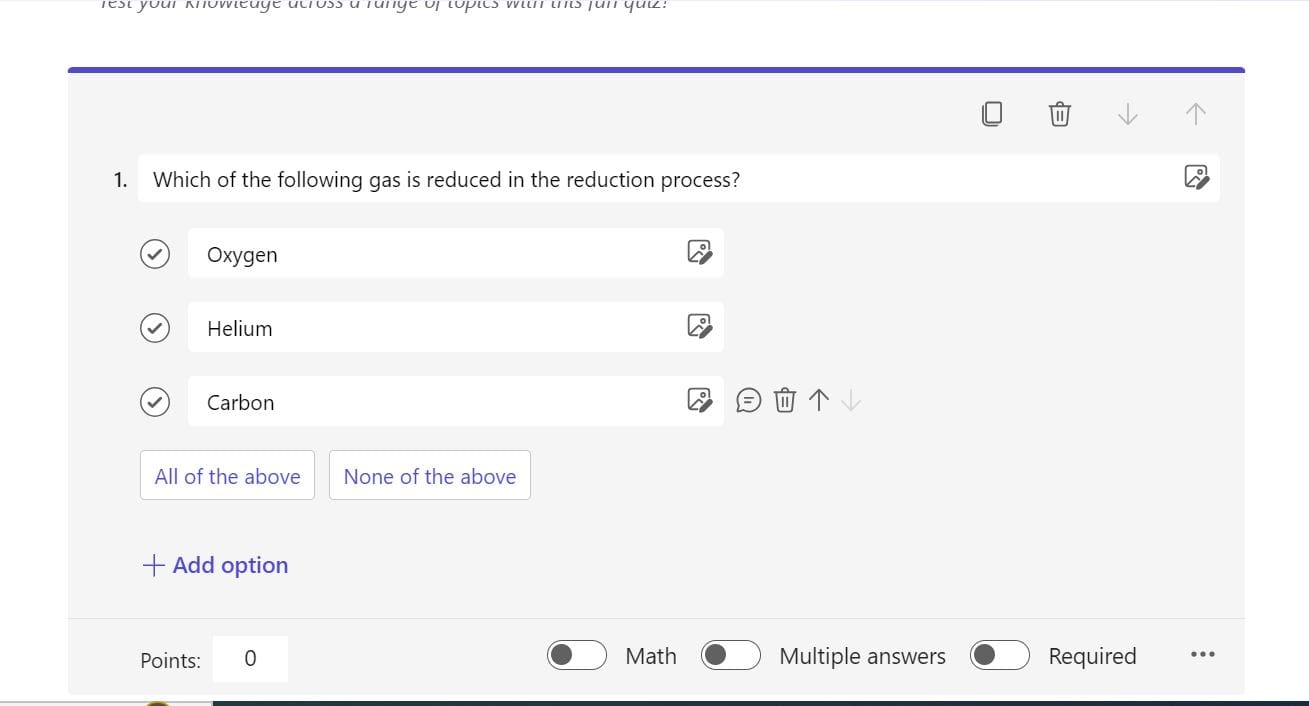
Let’s say you’re creating a general knowledge quiz and want to ask, “What is the capital of France?”
Select Choice.
Type the question.
Add answer options: Paris, Berlin, Madrid, etc.
Select the correct answer by ticking the circle next to Paris.
You can also add feedback for correct or incorrect answers, which helps make the quiz more engaging.
You can add as many questions as you like by repeating the process. Keep a mix of question types to maintain interest.
Step 5: Set Up Grading and Points
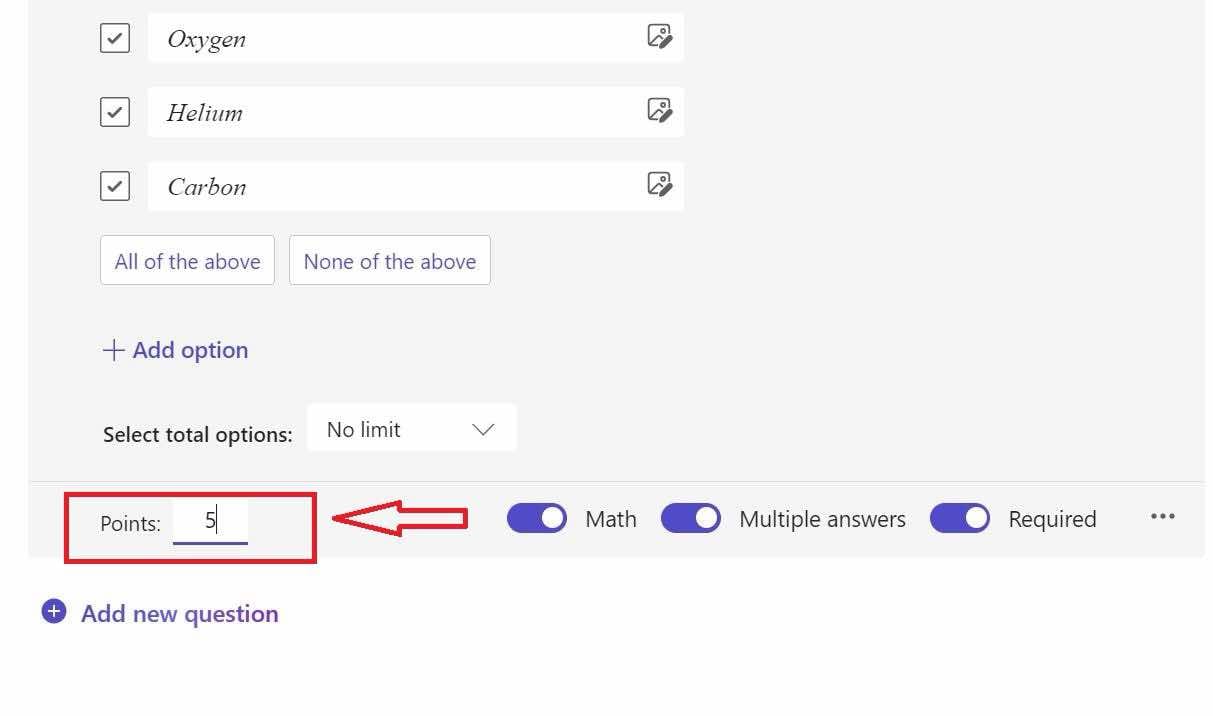
For quizzes, Microsoft Forms lets you assign points to each question. This is crucial for creating quizzes that provide an overall score at the end.
To assign points:
After creating a question, look for the points field on the right side of the question box.
Enter the number of points you want that question to be worth.
You can also provide custom messages for correct or incorrect answers, guiding the participant to learn more from their mistakes.
Step 6: Adjust Quiz Settings
After you’ve added all your questions, it’s time to tweak the settings to make sure the quiz behaves the way you want it to.
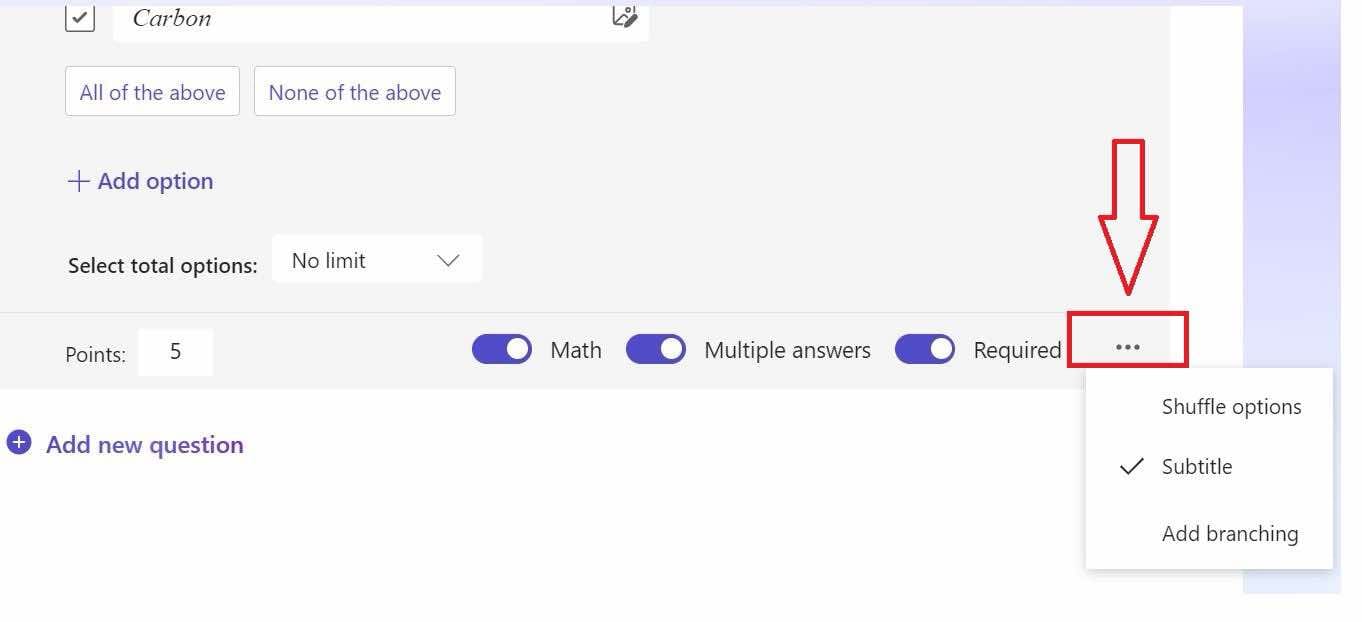
Click the three dots (settings menu) in the upper right corner and explore options like:
- Shuffle Questions: If you want the questions to appear in random order for different participants.
- Who Can Respond: Limit the quiz to people within your organization, or make it available to anyone with the link.
- Record Name: Decide if respondents need to submit their names, or if you want anonymous responses.
You can also set the quiz to automatically provide results upon completion, showing the user their score and any feedback you’ve added.
Step 7: Preview and Test Your Quiz
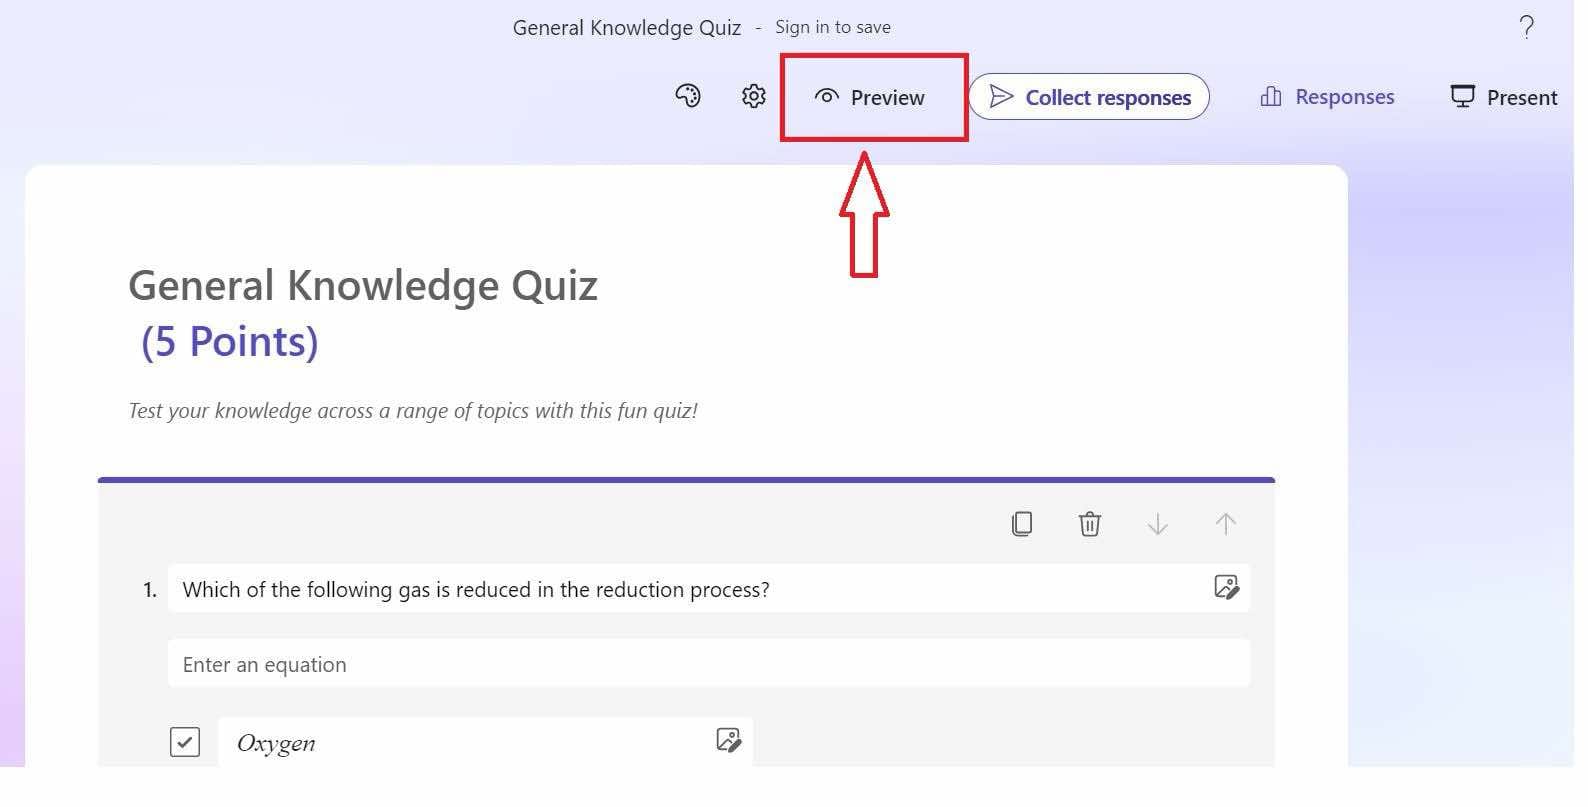
Before sharing your quiz, it’s essential to preview it. Click the Preview button at the top right of the screen to see how your quiz will look on both desktop and mobile devices. Make sure everything works as expected, from the design to functionality.
Take the quiz yourself or ask a colleague to test it. This is a good way to catch any mistakes and ensure a smooth experience for the end user.
Step 8: Share Your Quiz
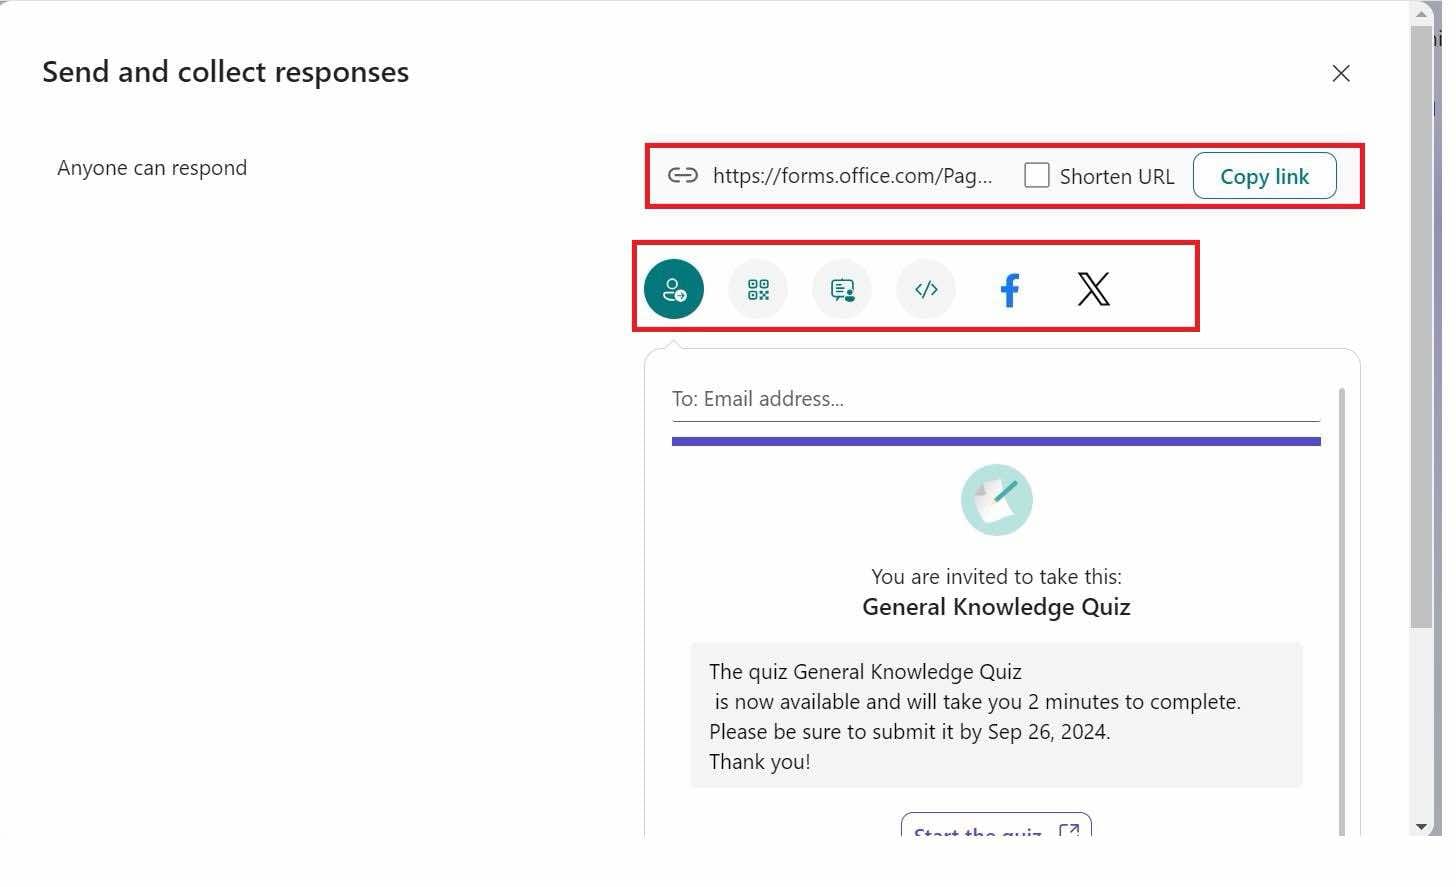
When you’re satisfied with your quiz, it’s time to share it! Click the Share button at the top of the page.
You can share your quiz in several ways:
Send a link: Copy and paste the link to send via email or any other platform.
QR code: Ideal for mobile users, you can generate a QR code for people to scan.
Embed: Microsoft Forms allows you to embed your quiz on a website or blog, perfect for educators or businesses wanting the quiz available directly on their site.
Email: Directly send the quiz via email to participants
Step 9: Analyze Results
One of the best parts of using Microsoft Forms for quizzes is the ability to analyze responses in real time.
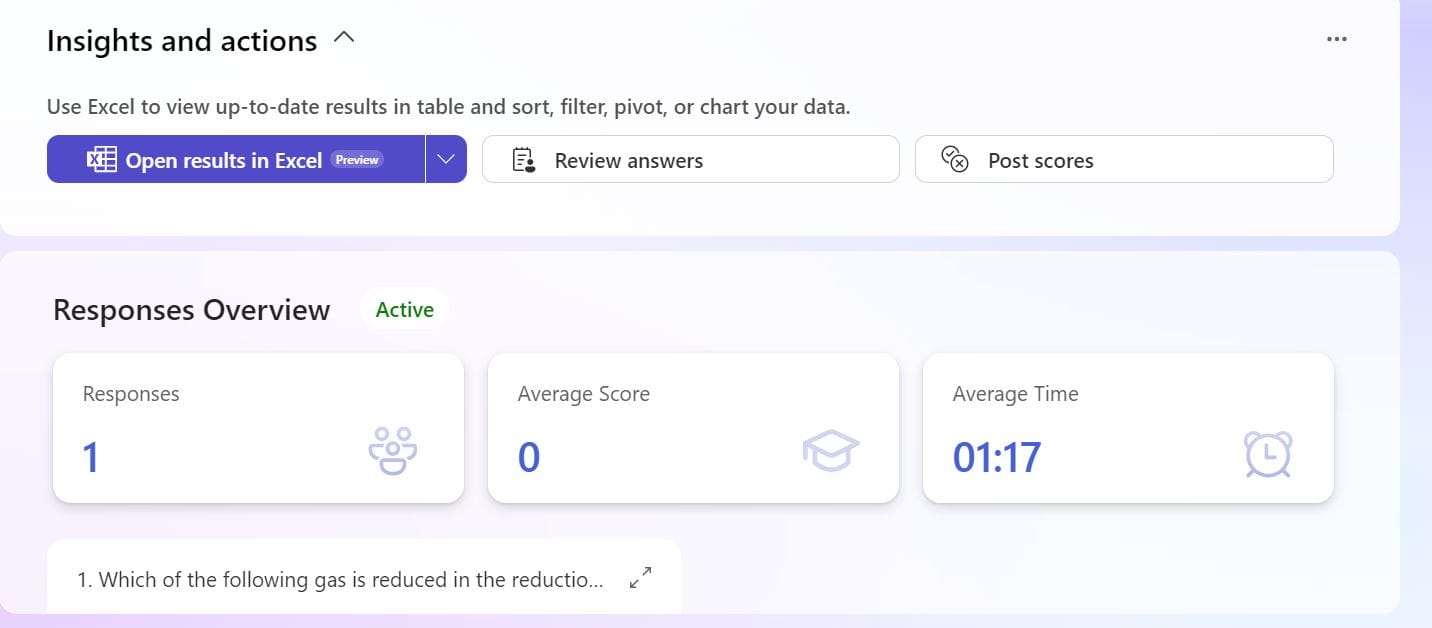
Once participants start completing your quiz, go back to the Forms homepage and click on the quiz title to view the results. You’ll see a summary of all responses, and if your quiz includes scoring, you’ll also see the participants’ scores.
To dive deeper, export the results to Excel for more detailed analysis. This can be particularly useful for large quizzes where you need to track data or feedback over time.
Want a form builder that adapts with you? Try HeyForm today and see how easy it is to improve and iterate on your forms!

Try HeyForm, a better alternative than Microsoft Forms
HeyForm is an open-source form builder that allows anyone to create engaging conversational forms for surveys, questionnaires, quizzes, and polls. Create custom surveys, quizzes, and polls with HeyForm's free form builder.
Conclusion
Creating quizzes in HeyForm is a breeze once you get the hang of it. From its intuitive interface to its powerful grading tools, HeyForm provides everything you need to build engaging, interactive quizzes that are perfect for education, business, or fun.
Whether you’re testing knowledge, gathering feedback, or simply entertaining, HeyForm offers a quick and effective solution. So, why not give it a try and start building your quiz today?
FAQs
1. Is it legal to collect employee emergency contact information?
Yes, collecting emergency contact information is legal and often required for workplace safety. However, it's important to ensure that the information is stored securely and used only for emergencies.
2. Can HeyForm ensure the security of the data collected?
Absolutely. HeyForm prioritizes data security and ensures that all information collected through forms is encrypted and securely stored.
3. How often should employees update their emergency contact information?
It’s recommended that employees update their emergency contact details at least once a year, or whenever their circumstances change.
4. Can I customize the fields on my emergency contact form in HeyForm?
Yes! HeyForm allows you to customize the form fields according to your specific needs, including adding additional contact fields, consent options, or medical information.
5. Can I track who has filled out the emergency contact form?
Yes, HeyForm’s analytics dashboard lets you monitor form submissions in real time. You can also set up reminders to ensure that all employees submit their information.
Stay Connected
Follow us on Twitter: https://x.com/HeyFormHQ
Join our community: HeyForm Community Forum
Subscribe to our newsletter: Stay updated with the latest tips on HeyForm and boost user engagement—optimize your forms and improve interactions effortlessly!